
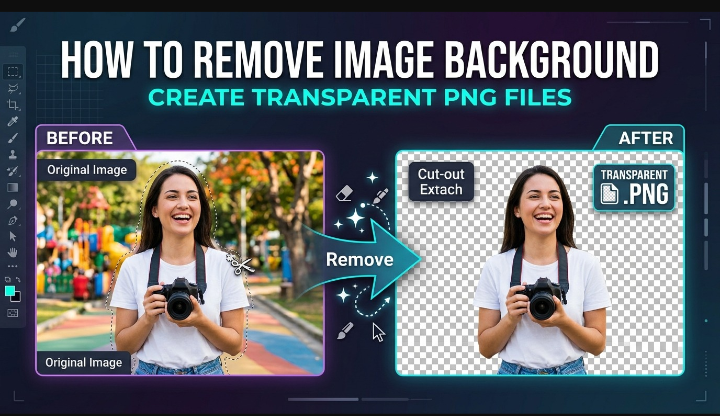
How to Remove Image Background and Create Transparent PNG Files
How to Remove Image Background and Create PNG Files for Your Designs
A transparent background is one of those small details that makes a huge difference — it’s what lets a logo sit cleanly on any color, or a product photo drop straight into a design without an ugly white box around it. The good news is you don’t need Photoshop or any design experience to do this properly. A few free tools handle it in seconds.
This guide walks through two reliable methods — one inside Canva, and one using a dedicated background remover — plus how to save the result correctly as a PNG so the transparency actually holds.
What You Need
- The image you want to edit (product photo, portrait, logo, etc.)
- A free Canva account, or access to a background remover tool like remove.bg
- A few minutes — most images process in under 10 seconds
Quick note before starting: background removal works best on images with a clear subject and a reasonably distinct background (a person against a plain wall, a product on a table). Busy or low-contrast backgrounds can sometimes produce rougher edges, which we’ll cover how to fix below.
Method 1: Remove Background Using Canva
Step 1: Upload Your Image
Open Canva, start a new design, and upload your image using the Uploads tab in the left sidebar. Drag it onto your canvas.
Step 2: Select the Image and Find Background Remover
Click on the image to select it. A toolbar will appear above the canvas — look for “Background Remover” (sometimes labeled “Effects” first, then Background Remover inside). This is part of Canva’s AI editing tools.
Step 3: Let It Process
Click the tool and Canva will automatically detect the main subject and strip out the background. This usually takes just a few seconds. Note that this feature is generally a Canva Pro feature, though a limited free trial or a few free uses are often available on the Free plan.
Step 4: Download as PNG
Once you’re happy with the result, click Share → Download, choose PNG as the file type, and make sure “Transparent background” is checked before downloading. Skipping this checkbox is the most common mistake — without it, Canva may fill the background with white instead of keeping it transparent.
Method 2: Remove Background Using remove.bg (No Design Skills Needed)
Step 1: Visit remove.bg
Go to remove.bg in your browser. No account is required for basic use.
Step 2: Upload Your Image
Click Upload Image and select your file. The tool processes it automatically and shows a preview with the background already removed.
Step 3: Download the Result
Click Download. The free version typically gives you a lower-resolution PNG; higher-resolution downloads usually require a paid credit or subscription. For social media graphics and most design work, the free resolution is often sufficient.
How to Clean Up Rough Edges
If the automatic removal leaves stray pixels or slightly rough edges around hair or fine details, most tools (including Canva) offer a manual “erase” or “restore” brush after the initial removal. Zoom in, and gently brush over the problem areas — erase to remove leftover background, restore to bring back parts of the subject that were accidentally cut.
Why PNG (and Not JPG)
This part trips a lot of beginners up: JPG files don’t support transparency at all — if you save a background-removed image as JPG, the transparent areas will automatically fill with white or black. PNG is the format built to preserve transparency, which is why it’s the standard choice for logos, overlays, and any image you plan to place on top of something else.
Once you’ve got the hang of removing backgrounds, this becomes one of those skills you’ll reach for constantly — for product mockups, profile graphics, thumbnails, you name it. If you want to go further with editing techniques like this, our Graphics, Design & Creativity section has more tutorials in this same direction.
How to Fix Common Problems
Background isn’t fully transparent after download: Double-check you selected PNG (not JPG) and, in Canva, that the “Transparent background” toggle was checked before downloading.
Edges look jagged or blurry: Use the manual erase/restore brush to clean up fine details, especially around hair or curved edges.
Tool removed part of the subject by mistake: Use the “restore” brush to paint the subject back in, or try a different tool — some handle certain image types (like fine hair or transparent objects) better than others.
Frequently Asked Questions
Is background removal free?
Yes, in most cases — Canva and remove.bg both offer free background removal, though higher-resolution downloads or unlimited use may require a paid plan.
Can I remove the background from a photo on my phone?
Yes, both Canva’s mobile app and remove.bg’s mobile-friendly site support this from a phone.
Will the image quality drop after removing the background?
Not significantly on paid/higher-resolution downloads. Free-tier downloads are sometimes capped at a lower resolution, which is worth checking if you need the image for print.
Can I remove backgrounds from videos too?
Some tools, including Canva, offer background removal for video as a separate feature, though it works a bit differently than with still images.
What’s the difference between PNG and JPG for design work?
PNG supports transparency and is best for logos, overlays, and graphics that need to sit on top of other content. JPG is better for standard photos where transparency isn’t needed, since it produces smaller file sizes.
Conclusion
Removing a background and saving it correctly as a PNG is a two-minute task once you know where to click — the real skill is knowing why PNG matters and catching the small mistakes (like forgetting the transparency toggle) that trip people up. Reading through the steps gets you most of the way, but running through it once yourself on a real image is what makes it stick.
To make that first attempt smoother, we’ve put together a free step-by-step checklist covering both methods above, plus a quick troubleshooting reference for messy edges — a genuinely practical companion for actually doing this rather than just reading about it.
Get the Free Background Removal Checklist
A quick-reference guide covering both methods, PNG export settings, and how to fix rough edges.
Have a question, or run into an issue removing a background? Drop it in the comment box below — we read every one — or reach the DCL Admin directly through our Contact Us page.
